

Sanghvi Crane

How to Choose the Right Arm Ball Joint?

Choosing the right Arm Ball Joint starts with the vehicle, not the price tag. A joint links the control arm to the steering knuckle and lets the suspension move as the wheel changes direction. That small part carries real loads. A loose or poorly matched joint can affect steering feel, tire wear, and handling. Small part. Big consequence.

Check the year, make, model, trim, engine, and suspension package against a trusted catalog or manufacturer fitment guide. Then compare the old joint’s mounting pattern, stud taper, thread, and dimensions, where accessible. Some vehicles use press-in joints; others use bolt-on designs or joints built into a control arm. Don’t assume two parts fit because their photographs look alike. They may not. A VIN lookup helps, but unusual trims and prior repairs can complicate the match. Verify again.

Choose a reputable brand with clear specifications, warranty information, and corrosion protection suited to local driving conditions. A grease fitting can aid maintenance, while a sealed design may be correct when specified by the vehicle maker. Clunks or uneven tire wear can point to several faults, not just a ball joint. Diagnosis matters. If inspection is difficult or you lack the proper tools, ask a qualified technician to confirm fitment and installation requirements. This is not a glamorous choice. Still, checking details now is better than discovering a mismatch after installation. It is easy to rush this step. That deserves a second look.
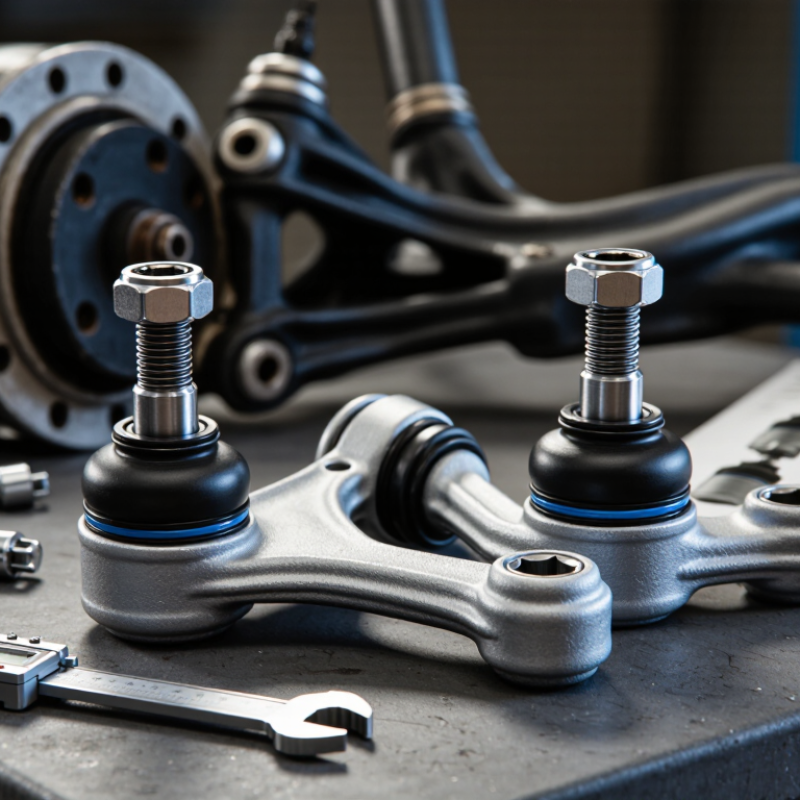
How to Choose the Right Arm Ball Joint?

Identify the Vehicle and Suspension Requirements

How to Choose the Right Arm Ball Joint?

Identify the Vehicle and Suspension Requirements

Start with the exact vehicle: model year, model, trim, engine, and VIN. A single model may use different suspension layouts or ball joints across trims. Check whether the joint fits the upper or lower control arm, and whether it is sold separately or integrated into the arm. Small details matter. Compare stud taper, thread size, mounting points, and dimensions with the vehicle’s service information or the original part.

Suspension changes affect fit, too. A lifted vehicle, modified control arms, or unusual ride height may need a joint designed for that setup. Don’t choose by appearance alone; a nearly matching taper can still create poor seating or unsafe movement.

S&P Global Mobility reported that the average age of U.S. light vehicles reached 12.6 years in 2024. That makes confirming the vehicle’s exact configuration especially useful when parts have been replaced before. The report describes vehicle age, not ball-joint failure rates.

Tips: Check the VIN and suspension type before ordering. Then compare the new joint with the removed part. Look for worn threads, a damaged boot, or an unexpected difference in stud angle. If fitment details conflict, pause and verify them with a qualified technician. It’s easy to overlook prior modifications. Do not assume the catalog is always right.

Understand Ball Joint Types and Mounting Positions

An arm ball joint links the control arm to the steering knuckle, allowing the wheel to move with the suspension and steering. Its position matters. A lower joint may carry vehicle weight, while an upper joint may mainly guide movement, but suspension designs vary. Check the vehicle’s service information before choosing a replacement; appearance alone can be misleading.

Look at how the joint mounts. Some are pressed into the control arm, while others bolt on or are integrated into the arm itself. A pressed joint needs the correct tools and support to avoid bending the arm. A bolt-in design may have a specific bolt pattern or orientation. Small details count. Compare the stud taper, housing shape, and dust boot with the part being removed.

Also confirm whether the joint is on the left or right side and at the upper or lower mounting point. These positions are not always interchangeable. Inspect nearby parts for looseness, torn boots, or rust around the mounting surface. A clean-looking joint can still have play, so check it using the method specified in the service procedure. I might be tempted to match parts by eye, but that shortcut can miss a different taper or mounting depth. After installation, follow the stated torque sequence and any alignment guidance.

How to Choose the Right Arm Ball Joint? - Understand Ball Joint Types and Mounting Positions

Joint type or configuration Typical position Main role Common mounting details What to check when choosing
Load-carrying ball joint Often lower in suspension designs where the coil spring loads the lower control arm; position depends on the suspension layout. Supports suspension loads while allowing the steering knuckle to pivot. May be fitted to a control arm or steering knuckle using a press-fit, flange, or other vehicle-specific arrangement. Confirm the vehicle’s suspension design and whether the joint is specified as load-carrying; do not assume the lower joint always carries the load.
Follower (non-load-carrying) ball joint May be used at the upper or lower control arm, depending on the suspension design. Guides suspension and steering-knuckle movement without serving as the primary spring-load support point. Can use several attachment styles; its position alone does not establish its load-carrying role. Match the specified role and joint design, not just the apparent shape or location.
Upper control-arm ball joint Between the upper control arm and steering knuckle on suspensions that use an upper arm. Allows articulation and helps locate the top of the steering knuckle. May be integral to the arm or separately mounted, depending on the vehicle. Check whether the replacement is a joint-only part or an arm assembly, and verify the correct side and application.
Lower control-arm ball joint Between the lower control arm and steering knuckle; common in many front suspension layouts. Allows suspension travel and steering pivot; it may be load-carrying or a follower joint. May be press-fit, bolted, riveted, or supplied as part of the control arm. Confirm the specified attachment method, dimensions, and whether the joint is replaceable separately from the arm.
Press-fit joint Commonly installed in a control-arm or knuckle bore, depending on the design. Provides a retained joint housing through an interference fit. Pressed into a correctly sized bore; retaining clips may be used where specified. Match the bore, housing dimensions, and retention method. Follow the vehicle service procedure when pressing it in or out.
Bolt-in or flange-mounted joint Attached to a control arm or knuckle with a matching mounting face. Secures the joint housing with bolts through its mounting flange. Uses a specific bolt count, hole pattern, flange shape, and fastener specification. Compare the flange and hole pattern, and use the specified fasteners and torque procedure.
Riveted joint Often found where the original joint is fixed to a control arm with factory-installed rivets. Attaches the joint housing to the arm using rivets. A service replacement may use bolts after the original rivets are removed, if the repair design specifies this. Check the replacement instructions and fastener kit; never substitute fasteners without an approved procedure.

Selection note: Ball-joint position and mounting style vary by vehicle. Verify fitment using the vehicle’s exact year, model, suspension configuration, and service specifications. The tapered stud connection to the steering knuckle is separate from the method used to attach the joint housing to the control arm.

Match Size, Taper, and Load Ratings

Choosing the right arm ball joint starts with exact dimensions, not a visual guess. Check the joint’s housing diameter, stud length, and mounting points against the vehicle’s service specifications. The tapered stud must match the steering knuckle’s taper in both angle and diameter. A near match can still seat incorrectly, loosen under movement, or damage the mating surface. Small differences matter. Don’t rely only on a worn joint for measurements; wear can distort what you see.

Tips: Confirm the part number against the vehicle’s year, model, and suspension configuration. Compare the taper and mounting pattern, then check the specified fastener torque during installation. Keep the packaging details until fit is confirmed.

Load ratings deserve the same care. A joint must handle the forces expected in its suspension position, including braking, cornering, and uneven-road impacts. Compare the listed load capacity with the vehicle or application requirements, and check whether the rating refers to static or dynamic loading. A larger-looking joint is not automatically stronger or suitable. Also verify that its articulation range and dust boot clearance allow normal suspension travel. If specifications conflict, pause and consult reliable service data; guessing here is an easy mistake, even for experienced hands.

Compare Materials, Seals, and Durability

Choosing an arm ball joint starts with its working environment. A forged, heat-treated steel stud can resist repeated steering and suspension loads, while the housing must support the bearing without binding. Do not judge by material names alone. Check the manufacturer’s specifications for load capacity, corrosion protection, and fit. A shiny coating may look reassuring, but it cannot compensate for poor machining.

The seal matters just as much. A flexible boot should stay seated through steering movement and keep grit and water away from the bearing. Inspect the folds and clamp area; a tiny tear can let abrasive dirt inside. Small detail. Big consequence. S&P Global Mobility reported that the average age of U.S. light vehicles reached 12.6 years in 2024. That figure describes the fleet, not ball-joint service life, but it highlights why durable replacement parts matter. When comparing joints, ask about boot material, grease retention, and corrosion testing. I would not assume one seal design is best in every climate; road salt, heat, and frequent rough-road use change the demands.

How to Choose the Right Arm Ball Joint? - Compare Materials, Seals, and Durability

Seal temperature capability is one factor in durability: a suitable boot helps keep contaminants out and grease in.

How to read this chart: Bars show typical service-temperature ranges, not guaranteed limits. Actual ranges vary by compound and manufacturer. For the arm and ball stud, compare corrosion protection, strength, vehicle fitment, and the supplier’s application-specific specifications; no single material or seal guarantees longer service life.

Verify Compatibility Before Purchase

How to Choose the Right Arm Ball Joint?

Verify Compatibility Before Purchase

Before ordering an arm ball joint, confirm the vehicle’s year, make, model, engine, and trim. A single model year can include different suspension setups. Check whether the part fits the upper or lower arm, and whether it belongs on the left or right side. Small details matter. Compare the joint’s stud taper, mounting-hole pattern, thread size, and overall dimensions with the original part or a reliable fitment catalog. If the catalog requests a vehicle identification number, use it to narrow the search. Do not rely on appearance alone; two joints can look similar but seat differently.

Also check whether your vehicle uses a pressed-in joint or a complete control-arm assembly. Review the manufacturer’s installation specifications for torque values and any required replacement fasteners. If the old part is available, compare its stamped number and measurements before removing it. That extra check takes a few minutes. It can prevent a return or a poor fit. Even careful checks can miss a mid-year change, so confirm uncertain details with a qualified parts specialist or repair professional. A part that fits securely and matches the suspension design is safer than one chosen by guesswork.

Article Source:

Scroll to Top