Sanghvi Crane

What Is a Dismantling Joint and How Does It Work?

A Dismantling Joint is a practical connection used in pipelines, valves, pumps, and other fixed systems. It allows technicians to remove heavy equipment without cutting the pipe or shifting nearby components. Its design usually combines a flanged body, adjustable length, sealing surfaces, and tie rods. These parts work together to create a controlled connection.

Dr. M. A. Malik, author of Pipeline Engineering, describes the principle clearly: “A reliable pipe joint must control movement, maintain sealing, and tolerate installation conditions.” This statement explains why a Dismantling Joint is more than a simple spacer. During installation, the joint can be extended or compressed to match the exact gap between flanges. Once aligned, the tie rods transfer axial forces and help prevent unwanted separation. The gasket then forms the pressure boundary.

Small details matter.

A technician may notice a few millimeters of misalignment near a valve. Without an adjustable joint, correction could require cutting, rewelding, or lifting the valve with additional equipment. With a Dismantling Joint, controlled adjustment can make removal more manageable. However, the joint does not solve every problem. Poor bolt tightening, damaged flange faces, incorrect gasket placement, or unrestrained pipeline movement can still cause leakage or failure. This is where the explanation becomes less comfortable: a well-designed product cannot compensate for careless installation. Understanding how each component carries load is essential before selecting, fitting, or maintaining a Dismantling Joint.

What Is a Dismantling Joint and How Does It Work?

Definition and Purpose of a Dismantling Joint

A dismantling joint is a flanged pipe fitting designed to make installation, inspection, and removal easier. It usually includes a central flange, a sealing gasket, and adjustable tie rods or bolts. The adjustable section creates controlled axial movement. Workers can loosen the joint, move the connected pipe, and remove a valve or pump without cutting the pipeline.

Its purpose becomes clearer during maintenance. Large valves are heavy, and rigid pipe sections leave little room for movement. A dismantling joint provides that working space while maintaining a sealed connection under operating pressure.

The 2023 U.S. EPA Drinking Water Infrastructure Needs Survey and Assessment estimates that drinking water systems require about $625 billion in investment over 20 years. Aging infrastructure makes practical access increasingly important. Still, a joint cannot correct poor alignment or weak support. That limitation is easy to overlook.

Tips: Check the manufacturer’s pressure rating, gasket material, bolt torque, and allowable adjustment range. Keep the joint centered during installation. Do not use excessive force to close a visible gap. A small alignment error today may become leakage tomorrow. Engineers should also verify pipe supports and thrust control before commissioning. Industry practice often treats this step as routine, but field conditions can challenge even a carefully prepared design.

Main Components and Their Functions

What Is a Dismantling Joint and How Does It Work?

Main Components and Their Functions

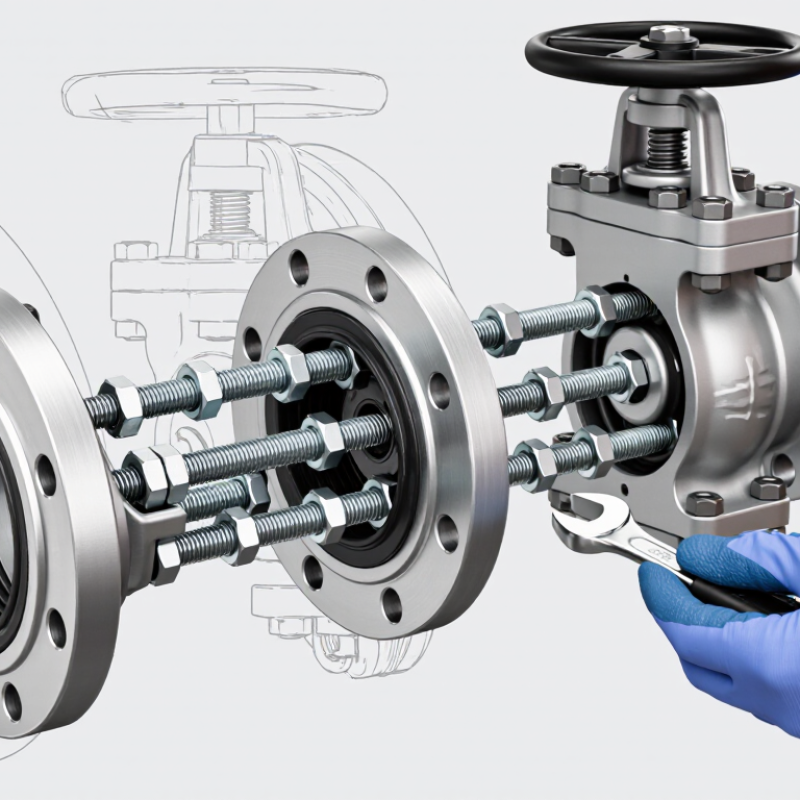
A dismantling joint connects flanged pipe sections while allowing controlled removal. Its central body bridges the pipe ends. Flanges transfer pressure across the connection. Tie rods resist axial movement during operation. Bolts compress the gasket and maintain sealing. The gasket fills small surface irregularities between flanges. Together, these parts create a stable, serviceable assembly. It is not an expansion joint unless specifically designed for movement.

The U.S. Environmental Protection Agency’s 2023 Drinking Water Infrastructure Needs Survey estimates $625 billion in required investment over 20 years. ASCE’s 2021 Infrastructure Report Card also cites approximately 240,000 water-main breaks annually in the United States. These figures explain why accessible pipeline connections matter. A dismantling joint can shorten valve, pump, and meter replacement work. In practice, technicians loosen the tie rods, adjust the joint length, and remove the equipment. Poor alignment still causes trouble. No component can correct every installation mistake.

Tips: Check flange faces before assembly. Keep the gasket centered. Tighten bolts gradually in a cross pattern. Measure exposed thread lengths afterward. Inspect corrosion around nuts and tie rods during maintenance. I have seen apparently minor misalignment create difficult removal months later. The joint seemed correct, but the pipe had shifted under load. That detail deserves more attention.

How a Dismantling Joint Operates Step by Step

A dismantling joint is a mechanical pipe fitting that connects flanged equipment and pipework. It allows controlled movement along the pipe axis. This movement makes pumps, valves, and other equipment easier to remove. The assembly usually includes a flanged adaptor, a sleeve, bolts, tie rods, and a sealing gasket. Each part has a practical purpose.

During installation, a technician places the joint between two flanges. The pipe ends are aligned, but a small adjustment gap remains. The adaptor and sleeve then slide into position. Bolts draw the flanges together and compress the gasket evenly. Tie rods control the joint’s length and transfer pulling forces. After tightening, the technician checks flange alignment and records bolt torque. A small alignment error can still cause stress later. This detail is easy to underestimate.

When maintenance begins, the line must be isolated and fully depressurized. The technician loosens the tie rods and flange bolts in a controlled sequence. The joint extends slightly, creating working space around the valve or pump. The equipment can then be removed without cutting the pipe. During reassembly, the gasket is inspected or replaced, and the joint returns to its measured length. A pressure test should follow before normal service resumes.

Tips: Measure the installation gap carefully. Tighten bolts in a cross pattern. Keep tie rods evenly loaded. Never use the joint to correct major pipe misalignment. Check for leakage after pressurization. If movement feels uneven, stop and inspect the assembly.

Common Applications in Piping Systems

A dismantling joint is a mechanical fitting that connects two pipe sections. It also allows controlled movement during installation and maintenance. Its central body usually includes flanged ends, a sealing arrangement, and adjustable tie rods. Installers can loosen the rods and create a small working gap. This gap makes equipment removal far easier than cutting the pipe.

Common applications include water treatment plants, pumping stations, and industrial process lines. Dismantling joints are often installed beside pumps, valves, flow meters, and strainers. For example, a pump may need removal after years of vibration and service. Without a dismantling joint, workers might disconnect several rigid connections. That task can require more time, lifting equipment, and replacement seals.

They also help manage installation tolerances. Pipe runs rarely align perfectly on the first attempt. However, the joint is not a solution for every alignment problem. Incorrect adjustment may place stress on flanges or affect gasket performance. The choice is not always obvious.

Tips: Confirm pipe diameter, pressure class, material compatibility, and face-to-face dimensions before ordering. Check the manufacturer’s installation instructions and project specifications. Tighten tie rods evenly, then inspect for leakage during controlled testing. Field conditions can differ from drawings, so measure the actual gap when possible. A qualified piping engineer should review unusual loads, buried installations, and high-temperature service.

Selection, Installation, and Maintenance Considerations

A dismantling joint connects flanged pipe sections while allowing controlled axial adjustment. Selection starts with service conditions, not price. Check pipe diameter, pressure class, temperature, fluid chemistry, flange standard, and expected movement. The joint should match the pipeline’s weakest component. For buried water mains, corrosion-resistant bolts and a compatible gasket matter greatly. ASCE’s 2021 Infrastructure Report Card rated U.S. drinking water infrastructure C−, highlighting the cost of aging assets and deferred renewal. Small specification errors can become expensive shutdowns.

Installation requires clean flange faces and accurate pipe alignment. Leave the manufacturer’s specified dismantling gap; excessive compression can damage the gasket. Tighten bolts in a diagonal sequence, using calibrated equipment and the specified torque. Do not use the joint to force badly misaligned pipe. That shortcut is common. It is also risky. Pipe supports, anchors, and thrust restraints must handle pressure forces independently, because a dismantling joint is not a substitute for structural restraint. Record bolt torque, gap dimensions, gasket type, and installation date for future inspections.

Maintenance should include visual checks for leakage, corrosion, coating damage, and bolt movement during planned shutdowns. The U.S. Environmental Protection Agency reports roughly 240,000 water-main breaks annually, so access planning deserves attention. Inspect joints near pumps, valves, and buried transitions first; vibration and repeated pressure changes often appear there. Replace damaged gaskets rather than tightening indefinitely. Retorquing may worsen a weakened seal. In practice, maintenance records are often incomplete, and that weakness deserves honest review. A clear inspection log can prevent guesswork during the next isolation.

What Is a Dismantling Joint and How Does It Work? - Selection, Installation, and Maintenance Considerations

Evaluation Dimension Typical Information Selection or Maintenance Guidance
Primary Function Creates an adjustable flanged connection between a valve, pipe, pump, meter, or other equipment item. Use it where equipment may need to be removed without cutting the pipeline or moving large pipe sections.
How It Works A telescopic body changes the face-to-face length, while tie rods transfer axial forces and maintain the assembled connection. Set the joint within its specified adjustment range; do not use it as a substitute for pipe alignment or permanent structural support.
Common Applications Water transmission, water treatment, pumping stations, industrial process lines, and buried or above-ground flanged pipework. Confirm that the application, fluid, pressure class, temperature, and installation environment are compatible with the joint design.
Nominal Size Range Commonly available from approximately DN50 to DN2000, depending on the design and applicable standard. Match the nominal diameter, flange drilling, outside diameter, and connection standard to the adjoining equipment.
Adjustment Allowance Many designs provide an installation adjustment of roughly ±25 mm to ±50 mm, although the exact range varies by size and manufacturer design. Verify the actual minimum, maximum, and nominal face-to-face dimensions before ordering and setting the pipework.
Pressure Rating Typical water-service ratings include PN10, PN16, and PN25; some systems use ASME pressure classes such as Class 150. Select a pressure rating equal to or greater than the system design pressure, including foreseeable surge conditions.
Body Material Common options include ductile iron, carbon steel, and stainless steel. Consider fluid chemistry, corrosion exposure, operating temperature, mechanical loads, and coating requirements.
Flange Compatibility Compatibility depends on nominal size, pressure class, bolt-hole pattern, flange outside diameter, and gasket seating arrangement. Check all mating dimensions; nominal size alone does not guarantee interchangeability between standards.
Gasket Selection Elastomeric gaskets such as EPDM or NBR are commonly used, subject to the fluid and temperature. Use a gasket rated for the service medium, pressure, and temperature. Replace damaged, hardened, or previously compressed gaskets.
Tie Rods and Fasteners Tie rods and nuts are commonly supplied in carbon steel or stainless steel, with corrosion protection selected for the environment. Confirm rod quantity, diameter, material, coating, and tightening requirements. Never remove restraints while the line is pressurized.
Installation Position Can be installed in horizontal or vertical pipework when the joint and support arrangement are suitable. Provide independent supports or anchors as required. The joint should not carry unplanned pipe weight or bending loads.
Pre-Installation Checks Inspect the joint, flange faces, gasket surfaces, fasteners, coating, and adjustment range before assembly. Remove dirt and protective transport materials from sealing surfaces, and confirm that the pipeline is depressurized and properly aligned.
Alignment Requirement Dismantling joints accommodate axial length adjustment but generally do not correct major angular or lateral misalignment. Correct pipe alignment and support conditions before tightening the joint.
Bolt Tightening Bolts should be tightened gradually in a diagonally opposite or cross-pattern sequence. Use the specified torque or tightening procedure. Uneven tightening can cause gasket leakage or flange distortion.
Pressure Testing Hydrostatic testing is commonly performed with clean water at the project-specified test pressure. Vent trapped air, increase pressure gradually, inspect for leakage, and follow the governing pipeline or project standard.
Routine Inspection Visual checks typically cover leakage, corrosion, coating damage, loose nuts, gasket extrusion, and unusual movement. Inspect during scheduled pipeline maintenance and after abnormal pressure events, vibration, flooding, or nearby excavation.
Replacement Indicators Persistent leakage, severe corrosion, damaged threads, distorted flanges, cracked components, or loss of adjustment capability. Isolate and depressurize the line before repair or replacement. Investigate the underlying cause rather than only replacing the gasket.
Scroll to Top